Janet's Shenanigans

calendar: – oh hey there's a menu bar – why can't i scroll the calendar with normal scrolling stuff – figuring out how to add tasks took a while – the add task thing just . Didn't work and the calendar selection was empty – i had to go to settings – click on everything until i clicked on “accounts” – at which case i noticed a local file was being called an “account” – that was confusing – i clicked on it to try and figure out why it wasnt showing – i tried playing with the file path – that did nothing – i renamed the personal calendar to something – at which case it decided to show up in the sidebar behind the settings windows – i clicked a day and couldn't figure out how to get back – the toolbar only had week/3 days/1 day options – i looked in the menu bar to find the 1 month option – i feel like the 3 day option could be replaced with a 1 month option – and then the other less-common options could go in the menu bar – back at the month view i clicked calendar and tried to add a thing to my day – was still just empty despite me now having a calendar – at this point i give up adding a task – i look in the settings again to try and adjust the view of weekdays so that saturday and sunday are at the end – there's no such setting – the appearance setting is filled with stuff that i don't understand or don't care about – “use popup to show incidence information” what – “show (sub)tasks in calendar views” why would i disable my reason for using the app – there's a bunch of toggles for swipeable/basic views – but . the views aren't swipeable – it looks like it just toggles the animation that plays when you click the buttons – why should i care how the weekday labels are aligned this is a calendar app not a typesetting app – why should i care how verbose they are theres plenty of space in the window to always show the full text – if i resize it they shrink down – “grid border width” am i the app user or the app designer – “show week numbers” finally a setting that i can comprehend and actually want to toggle – “enable maps” what maps???? – also why is a feature toggle in the “appearance” window – that's all of the settings there – guess there's no setting for actually changing how the calendar is arranged just a bunch of designer toggles – don't have anything else to do here considering i can't add tasks

contact: – scanning through the menu bar – file menu only has “quit merkuro” there is no file management in the file menu – that's not a lot of functionality – anyways let's make a contact – why is “blog feed” the second text box – to whom is that more important than phone number email address IM handles business information and wait there's no IRL address thing here??? – anyways i put in the name and a picture – and press create – it crashes – i noticed the contact book thing was greyed out – do i need to try giving the default one a name again – off to the settings – there's no option for me to give a name – so i will not – nothing else i can do here

mail: – The Email program encountered a fatal error and will terminate now – welcome back OS 9 i missed your love of “i died and there's nothing you can do about it and im not going to tell you why” dialogs :) – nothing else to say here

toki.club is a pubnix (public unix system) with a toki pona theme!

I configured: – an idm (identity management system) for centralised account management, namely kanidm. It has impressed me enough that I'm contributing an i18n system to it now. – https hosting for users – ejabberd for pubnix-wide chat

Come stop on by and take a look at what we're doing at https://toki.club

CivReign is long dead by now, but we can take a look back at the data I gathered through The Reign Form and see what that says about how the server died.

Demographics

76 respondents filled out the form, which made up a substantial portion of the server’s active population. Estimates range from 30% to 40% at the time of the form.

The most common nations from respondents were: – Duchy of Courron (9) – Laurentia (8) – Norlund (5) – Gensokyo (4) – Fomhar, Mount Ida Vangar (3)

76% of respondents indicated they came to the server to build.

Analysis: Given the server’s CivRealms-like grinding required to achieve even iron-level tools, as well as basic building materials like glass being locked behind factories and wood being locked behind multi-IRL-day growth times, it’s likely that the builder demographic being alienated from CivReign was one of the main reasons for the server’s rapid decline.

46% of respondents indicated they came to the server to grind.

Analysis: Frankly, I’m not sure how to make sense of this. With the immense grindiness of the server, this demographic should have stuck around. Perhaps the grind was too hard to get to? Plants tons of days to grow and were fickle about location. Effective ore mining rates were locked behind hard-to-locate portals that players kept to themselves. Animals, one of the server’s most touted features, weren’t widely available until a few weeks post-launch. Also, I would be remiss not to mention the botting rules disallowing grinding via bots as a possible factor.

60% of respondents indicated they came to the server to roleplay.

Analysis: I don’t know what to say here that I’m not going to say about people who came for the community.

40% of respondents indicated they came to the server to explore.

Analysis: Given the difficulty of growing food and the massive cost of boats, it’s likely explorers were alienated by the inability to explore.

64% of respondents indicated they came to the server for the community.

Analysis: This is one of those demographics that mostly relies on others being there, so alienation of other groups alienates this group. This demographic also doesn’t take kindly to start-of-the-world murder.

10% of respondents indicated they came to the server to dominate.

Analysis: Like socialisers, dominators want other players to dominate over, and alienating those will also alienate dominators. It’s also likely the scarcity of materials made it harder for dominators to feel in-control.

Past Servers

70% of respondents had played CivMC previously.

Analysis: A lot of the former CivMC players had indicated feeling alienated from CivMC; CivReign was effectively their glimmer of hope to them. The sheer difference from CivMC and difficulty of getting established may have alienated this demographic.

53% of respondents had played CivRealms previously.

Analysis: Given the similarity of CivReign to CivRealms, it’s not surprising it drew in the same crowd.

23% of respondents had played the CivReign beta previously.

Analysis: Given how dramatically different the full launch was from the CivReign beta, these players were almost certainly alienated from the get-go. Many indicates as such on write-ins on the survey as well.

Feelings

76% of respondents indicated they felt neutrally to positively about the server, with most (36%) indicating they only felt slightly positively about the server.

89% of respondents indicated they felt the server would change for the better over time, with most (35%) indicating they felt very strongly positive about the direction it was heading.

73% of respondents indicated they felt CivReign was better than the servers they had played previously, with most (30%) indicating they only felt slightly better about CivReign than past servers.

Write-Ins

Common sentiments throughout write-in positives in rough order of frequency were: – Admins that communicated better compared to past Civ servers (See also: Most players came from CivMC.) – Admins were more willing to make changes compared to past Civ servers – The world generation was beautiful – The tech tree looked interesting – The server was unique compared to other servers

Common sentiments throughout write-in negatives in rough order of frequency were: – The server felt half-baked and buggy on launch – The grinding was boring, and obtaining resources was too difficult for the benefit – Requirement to get tin and copper to progress to iron-level tools whilst requiring iron-level gear to travel long distances and limiting effective mining to another dimension with rare portals – Admins failed to address issues past the surface level – Plants, especially trees, took too long to grow – Biomes were strange

Conclusion

I think it’s safe to say that whilst the launch was promising, we can point to the immense yet boring grinding as the main killer of the server.

Builders and socialiers/roleplayers, the largest demographic, were alienated by the inability to obtain iron-level tools and basic building materials without needing to grind.

Grinders felt the grinding was boring and inaccessible to get to “the good parts” of grinding.

From this the other demographics fell out from a lack of people to interact with.

Data

https://docs.google.com/spreadsheets/d/1VMrs0n8A6ae7QE_lTIa_16b9DBeg8rBmc_uUMO1Cl48/edit?usp=sharing

The source for all the tools mentioned in this blog post is available here

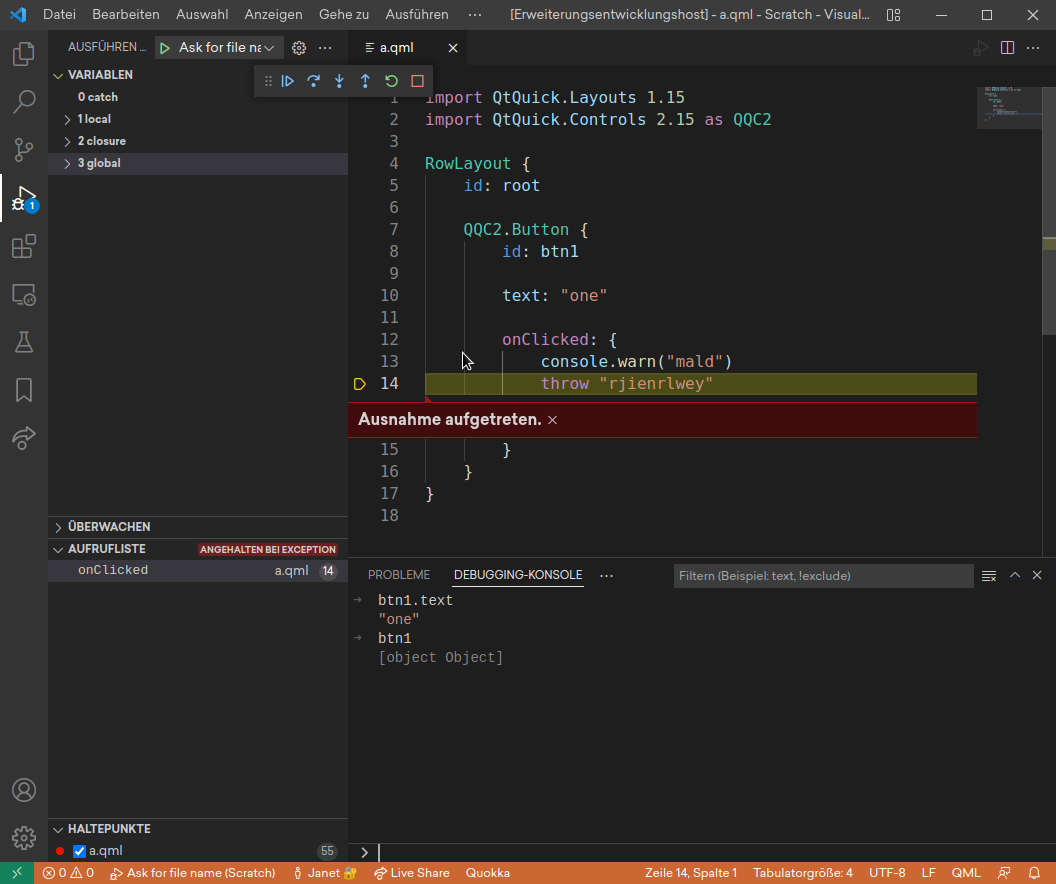
A screenshot of QML DAP providing debugger functionality for QML in VSCode

qml-dap: QML debugger for editors

While working on qml-lsp, I took a tangent to write a DAP implementation for QML. This ended up being a very long tangent, but it's worth it: being able to debug QML without needing Qt Creator available. The DAP protocol is the debugger equivalent to LSP: it's a cross-editor and cross-language protocol that allows debuggers to implement DAP and get support for a bunch of editors, and allows editors to implement DAP and get support for a bunch of debuggers.

In short, this means that you can use qml-dap in combination with a DAP-supporting editor of your choice, and gain access to a debugger.

Note that QML DAP doesn't support the entirety of DAP, but supports enough to serve as an improvement over print debugging. More of the protocol will be covered as I improve qml-dap.

qml-dbg: QML debugger for the terminal

While writing the code necessary for debugging QML programs for qml-dap, I realised that QML had no command line debugger. So, I wrote one, and called it qml-dbg.

The output of a sample qml-dbg session is provided here for your browsing:

❯ qml-dbg
Hi, welcome to qml-dbg! Type "help" if you want me to explain how you use me.
> attach localhost:5050
Connecting to localhost:5050...
I connected to the program! Now, you can start debugging it.
> b a.qml:13
I set breakpoint #0
The program will pause right before it starts to run that line of code
You can disable it with 'breakpoint-disable 0'
See active breakpoints with 'breakpoints'
> breakpoints
Breakpoints:
        #0 at a.qml:13
> breakpoint-disable 0
Disabled breakpoint 0
> breakpoints
Breakpoints:
        (disabled) #0 at a.qml:13
> breakpoint-enable 0
Enabled breakpoint 0
The program paused!
Run 'backtrace' to see a stack trace.
> 
> bt
Most recently called function:
        onClicked in a.qml:13 (file:///home/jblackquill/Scratch/a.qml)
> eval btn1.text = "hello debugger!"
"hello debugger!"
> continue
> 

qml-lint: standalone linting tool

If you really liked qml-lsp's lints, then you can now have them standalone on the command-line.

❯ qml-lint a.qml 
12:3 - 12:6     a.qml   Don't use var in modern JavaScript. Consider using "const" here instead. (var lint)

        var a = 5

15:2 - 15:14    a.qml   Don't use anchors.fill in a RowLayout. Instead, consider using "Layout.fillWidth: true" and "Layout.fillHeight: true" (anchors in layouts lint)

        anchors.fill: parent

Tags: #libre

The Cool Now

With the infrastructure I built in qml-lsp for parsing and analysing QML files, I thought “hm, since doxyqml is just a glorified qml parser –> c++ header file converter, wouldn't it be trivial to write the same thing in go reusing qml-lsp's infrastructure?” And that's exactly what I did. I wrote a 130-line program that faithfully replicated doxyqml's functionality in Go.

By virtue of being a Go program that calls on a pretty optimised parser in C, it ended up being a little over 10 times faster than doxyqml on my system.

I wasn't done there.

I thought “hmm, couldn't I reuse the semantic analysis I did for qml-lsp to improve the output a bit?”

So, that's pretty much what I did.

Currently, the most notable improvement over doxyqml is in producing a better superclass for the output:

doxyqml, with aliased import (import foo as bar):

class Avatar : public QtQuick.Controls.Control {

doxyqml, without aliased import:

class Avatar : Control {

One isn't valid C++ (I'm surprised Doxygen takes it at all), and the other fails to specifically name where Control comes from, leading to issues with Doxygen trying to locate the superclass.

qml-doxygen reuses the semantic analysis from qml-lsp to generate the following output, whether the import is aliased or not:

class Avatar : public QtQuick::Controls::Control {

It's both valid C++, and tells Doxygen exactly where the name is coming from.

The Roadmap

The next thing I'm planning to do is to resolve the concrete type of an alias property, so that documentation generation for aliases can be improved without developers needing to explicitly tell the computer what type the alias points to.

I may also add the ability to “splat” grouped properties with a special sigil, so that something like readonly property AvatarGroup actions: AvatarGroup { } can be expanded into the properties of the AvatarGroup by qml-doxygen, resulting in better documentation.

Tags: #libre

qml-lsp

I worked on fancying up qml-lsp's underlying infrastructure and added some new features. One of the more noticeable things is that attached properties can complete now:

screenshot of completing an attached property

There's also some lints:

screenshot of linting warning about an unused import

Currently there's some lints warning against usage of language features that negatively impair readability, (with statements, alias, etc.), warning about using anchors in a Layout, and unused imports.

Shades

Shades is a small utility app I made that lets you grab shades of a colour.

screenshot of shades

It uses the OKLAB colour space to generate shades, which means it produces really good variations on a colour that only differ in visual brightness instead of going “off-brand” like other colour spaces would have.

Tok

Yeah, Tok just has the “saved messages” room display as such instead of using your account's name and avatar. Not much, which is why it's getting lumped in here instead of in its own blog post.

Tags: #libre

This response from a reader pretty much sums it up:

Stop One: Will Craft Work?

Craft seems like the no-brainer for a KDE project to use, considering it's in-house and supports all of KDE's frameworks and has packaging capabilities. Unfortunately, what sounds good on paper does not translate to what's good in execution.

When I first checked it out, the current version being shipped had incorrect code that would have failed to compile had it been a compiled language instead of Python. Heck, even running a typechecker for Python would have revealed the fact that the code was trying to call a function that didn't exist. Yet, this managed to get shipped. Not a good first impression.

After manually patching in the function into existence on my system, I ran into another hurdle: Craft's env script is broken; mangling PATH to an extent where entries like /usr/bin and /bin and other things got just truncated into oblivion, resulting in a shell where you couldn't do much of anything.

After manually patching PATH to be not mangled, I ran into another and the final hurdle before I gave up: Craft tried to use half bundled libraries and tools and half system libraries and tools, resulting in dynamic linker errors from system tools not finding symbols they needed from bundled libraries.

When I brought these issues up in the Craft chat, the answers basically amounted to a lack of care and “go use Ubuntu.” Not acceptable for Tok considering most of the people interested in building Tok like this don't use Ubuntu, and honestly doesn't make you have much faith in a system for porting utilities to other platforms if said system doesn't even work across the distributions of one platform.

Stop Two: Maybe Conan?

Conan seems like the second-in-line no-brainer for Tok to use. It's the largest C++ package manager, even supporting Qbs. Of course, like with Craft, what sounds good on paper doesn't match up to execution.

Out of the gate, I looked at the Qt package, only to find that there was one (1) Qt package for it consisting of the entirety of Qt, WebEngne and all. Kinda oof, but not a deal breaker. Well, it wouldn't be a dealbreaker if Conan had prebuilt Qt packages for

- Settings: arch=x86_64, build_type=Release, compiler=gcc, compiler.version=11, os=Linux

But it doesn't. I'm not going to build an entire web engine just for an attempt at maybe getting a non-Linux build of Tok, and having to build a web engine as part of Tok's CI is a no-go in terms of disk, memory and CPU.

Stop Three: vcpkg

Considering Microsoft has been a developer tools company for about as thrice as long as I've been alive, I hope their take at the C++ package manager thing is worth their salt.

Some weirdness ensued with the VCPKG_ROOT environment variable at first, but it was easy to fix by pointing it at the vcpkg repo.

While doing the vcpkg install, I found the output somewhat hard to follow, so I had no idea how far along it was. I just let it sit since it seemed to be making progress.

While vcpkg didn't have prebuilt binaries for my setup, it didn't require building all Qt modules like Conan did, so the ask was much more reasonable.

And then I noticed a big issue: vcpkg has absolutely zero versioning, other than the git repository with all the package manifests. This essentially means that in order to build with Qt5, I need to commit to an ancient version of vcpkg packages and stay there indefinitely. I also have to ask users to roll back their vcpkg install that far to build Tok. Not really acceptable as an ask for people who might want to build Tok for not Linux.

Stop Four: Wait, It's Already Here (At Least For Macs)

Turns out Nix, the thing that Tok already supports building with, also supports macOS. Well, that was easy. While it doesn't spit out a premade .app like other porting systems can do, it does ensure a working build with available dependencies, which is already most of the way there.

Conclusion: Apples And Penguins Rule, Everyone Else Drools

Cross-platform C++ packaging and distribution is still a very unsolved problem, unlike other languages/frameworks like Go, Electron, Rust, Zig, etc. as I learned painfully through these escapades. Nix seems the most promising on this front, as it offers a very consistent environment across platforms, which gets you most of the way there in terms of building. It doesn't support Windows (yet?), but simply being able to use a functional compiler instead of Apple Clang is already a killer feature for using it to port apps to macOS.

Qbs is also a huge help in terms of the porting process, as it natively supports building things that require auxiliary scripts or build system hacks with other build systems, like .app bundles, Windows installers, and multi-architecture .app/.aab/.apks with just a few or no extra lines in the build system.

For Tok on macOS, all I need to do is add these two lines to the build script in order to get a usable .app file from it:

Depends { name: "bundle" }
bundle.isBundle: true

While it lacks a lot of metadata that you need to fill in yourself, it's again, another 99% of the way there solution where the remaining 1% is mostly just a little data or boilerplate or running a tool.

I still haven't figured out what I'll be doing for Windows, but the need for an end-user Windows package is still a long ways off, considering Tok is still nowhere near a 1.0 release status. Perhaps I can make leverage of Fedora's mingw packages or check out https://mxe.cc/, or maybe just install dependencies from source to a Windows system without a package manager, and bundle them during the build process. If you have any suggestions, do feel free to hop on by in the Tok chat and drop them.

Tags: #libre

This is the sequel post to the previous post on hRPC; after hRPC has matured and gotten an actual spec written for it. This post contains much more information about hRPC, as well as tutorials for it.

This post is mirrored from our post on dev.to

Co-authored by: Yusdacra (yusdacra@GitHub), Bluskript (Bluskript@GitHub), Pontaoski (pontaoski@GitHub)

hRPC is a new RPC system that we, at Harmony, have been developing and using for our decentralized chat protocol. It uses Protocol Buffers (Protobufs) as a wire format, and supports streaming.

hRPC is primarily made for user-facing APIs and aims to be as simple to use as possible.

If you would like to learn more, the hRPC specification can be found here.

What is an RPC system? If you know traditional API models like REST, then you can think of RPC as a more integrated version of that. Instead of defining requests by endpoint and method, requests are defined as methods on objects or services. With good code generation, an RPC system is often easier and safer to use for both clients and servers.

Why hRPC?

hRPC uses REST to model plain unary requests, and WebSockets to model streaming requests. As such, it should be easy to write a library for the languages that don't already support it.

hRPC features:

  • Type safety
  • Strict protocol conformance on both ends
  • Easy streaming logic
  • More elegant server and client code with interfaces/traits and endpoint generation.
  • Cross-language code generation
  • Smaller request sizes
  • Faster request parsing

Why Not Twirp?

Twirp and hRPC have a lot in common, but the key difference that makes Twirp a dealbreaker for harmony is its lack of support for streaming RPCs. Harmony's vision was to represent all endpoints in Protobuf format, and as a result Twirp became fundamentally incompatible.

Why Not gRPC?

gRPC is the de-facto RPC system, in fact protobuf and gRPC come together a lot of the time. So the question is, why would you want to use hRPC instead?

Unfortunately, gRPC has many limitations, and most of them result from its low-level nature.

The lack of web support

At Harmony, support for web-based clients was a must, as was keeping things simple to implement. gRPC had neither. As stated by gRPC: > It is currently impossible to implement the HTTP/2 gRPC spec in the browser, as there is simply no browser API with enough fine-grained control over the requests.

The gRPC slowloris

gRPC streams are essentially just a long-running HTTP request. Whenever data needs to be sent, it just sends a new HTTP/2 frame. The issue with this, however, is that most reverse proxies do not understand gRPC streaming. At Harmony, it was fairly common for sockets to disconnect because they are idle for long stretches of time. NGINX and other reverse proxies would see these idle connections, and would close them, causing issues to all of our clients. hRPC's use of WebSockets solves this use-case, as reverse proxies are fully capable to understand them.

In general, with hRPC we retain the bulk of gRPC's advantages while simplifying stuff massively.

Why not plain REST?

Protobuf provides a more compact binary format for requests than JSON. It lets the user to define a schema for their messages and RPCs which results in easy server and client code generation. Protobuf also has features that are very useful for these kind of schemas (such as extensions), and as such is a nice fit for hRPC.

A Simple Chat Example

Let's try out hRPC with a basic chat example. This is a simple system that supports posting chat messages which are then streamed back to all clients. Here is the protocol:

syntax = "proto3";

package chat;

// Empty object which is used in place of nothing
message Empty { }

// Object that represents a chat message
message Message { string content = 1; }

service Chat {
  // Endpoint to send a chat message
  rpc SendMessage(Message) returns (Empty);
  // Endpoint to stream chat messages
  rpc StreamMessages(Empty) returns (stream Message);
}

By the end, this is what we will have:

vue client being demonstrated

Getting Started

NOTE: If you don't want to follow along, you can find the full server example at hRPC examples repository.

Let's start by writing a server that implements this. We will use hrpc-rs, which is a Rust implementation of hRPC.

Note: If you don't have Rust installed, you can install it from the rustup website.

We get started with creating our project with cargo new chat-example --bin.

Now we will need to add a few dependencies to Cargo.toml:

[build-dependencies]
# `hrpc-build` will handle generating Protobuf code for us
# The features we enable here matches the ones we enable for `hrpc`
hrpc-build = { version = "0.29", features = ["server", "recommended"] }

[dependencies]
# `prost` provides us with protobuf decoding and encoding
prost = "0.9"
# `hrpc` is the `hrpc-rs` main crate!
# Enable hrpc's server features, and the recommended transport
hrpc = { version = "0.29", features = ["server", "recommended"] }
# `tokio` is the async runtime we use
# Enable tokio's macros so we can mark our main function, and enable multi
# threaded runtime
tokio = { version = "1", features = ["rt", "rt-multi-thread", "macros"] }
# `tower-http` is a collection of HTTP related middleware
tower-http = { version = "0.1", features = ["cors"] }
# Logging utilities
# `tracing` gives us the ability to log from anywhere we want
tracing = "0.1"
# `tracing-subscriber` gives us a terminal logger
tracing-subscriber = "0.3"

Don't forget to check if your project compiles with cargo check!

Building the Protobufs

Now, let's get basic protobuf code generation working.

First, go ahead and copy the chat protocol from earlier into src/chat.proto.

After that we will need a build script. Make a file called build.rs in the root of the project:

// build.rs
fn main() {
    // The path here is the path to our protocol file
    // which we copied in the previous step!
    //
    // This will generate Rust code for our protobuf definitions.
    hrpc_build::compile_protos("src/chat.proto")
        .expect("could not compile the proto");
}

And lastly, we need to import the generated code:

// src/main.rs
// Our chat package generated code
pub mod chat {
    // This imports all the generated code for you
    hrpc::include_proto!("chat");
}

// This is empty for now!
fn main() { }

Now you can run cargo check to see if it compiles!

Implementing the Protocol

In this section, we will implement the protocol endpoints.

First, get started by importing the stuff we will need:

// src/main.rs
// top of the file

// Import everything from chat package, and the generated
// server trait
use chat::{*, chat_server::*};
// Import the server prelude, which contains
// often used code that is used to develop servers.
use hrpc::server::prelude::*;

Now, let's define the business logic for the Chat server. This is a simple example, so we can just use channels from tokio::sync::broadcast. This will allow us to broadcast our chat messages to all clients connected.

// ... other `use` statements

// The channel we will use to broadcast our chat messages
use tokio::sync::broadcast;

Afterwards we can define our service state:

pub struct ChatService {
    // The sender half of our broadcast channel.
    // 
    // We will use it's `.subscribe()` method to get a
    // receiver when a client connects.
    message_broadcast: broadcast::Sender<Message>,
}

Then we define a simple constructor:

impl ChatService {
    // Creates a new `ChatService`
    fn new() -> Self {
        // Create a broadcast channel with a maximum 100
        // amount of items that can be pending. This
        // doesn't matter in our case, so the number is
        // arbitrary.
        let (tx, _) = broadcast::channel(100);
        Self {
            message_broadcast: tx,
        }
    }
}

Now we need to implement the generated trait for our service:

impl Chat for ChatService {
    // This corresponds to the SendMessage endpoint
    // 
    // `handler` is a Rust macro that is used to transform
    // an `async fn` into a properly typed hRPC trait method.
    #[handler]
    async fn send_message(&self, request: Request<Message>) -> ServerResult<Response<Empty>> {
        // we will add this in a bit
    }
    
    // This corresponds to the StreamMessages endpoint
    #[handler]
    async fn stream_messages(
        &self,
        // We don't use the request here, so we can just ignore it.
        // The leading `_` stops Rust from complaining about unused
        // variables!
        _request: Request<()>,
        socket: Socket<Message, Empty>,
    ) -> ServerResult<()> {
        // we will add this in a bit
    }
}

And now for the actual logic, let's start with message sending:

#[handler]
async fn send_message(&self, request: Request<Message>) -> ServerResult<Response<Empty>> {
    // Extract the chat message from the request
    let message = request.into_message().await?;

    // Try to broadcast the chat message across the channel
    // if it fails return an error
    if self.message_broadcast.send(message).is_err() {
        return Err(HrpcError::new_internal_server_error("couldn't broadcast message"));
    }
    
    // Log the message we just got
    tracing::info!("got message: {}", message.content);

    Ok((Empty {}).into_response())
}

Streaming logic is simple. Simply subscribe to the broadcast channel, and then read messages from that channel forever until there's an error:

#[handler]
async fn stream_messages(
    &self,
    _request: Request<()>,
    socket: Socket<Message, Empty>,
) -> ServerResult<()> {
    // Subscribe to the message broadcaster
    let mut message_receiver = self.message_broadcast.subscribe();

    // Poll for received messages...
    while let Ok(message) = message_receiver.recv().await {
        // ...and send them to client.
        socket.send_message(message).await?;
    }

    Ok(())
}

Let's put all of this together in the main function. We'll make a new chat server, where we pass in our implementation of the service. We'll be serving using the Hyper HTTP transport for the server, although this can be swapped out with another transport if needed.

// ...other imports

// Import our CORS middleware
use tower_http::cors::CorsLayer;

// Import the Hyper HTTP transport for hRPC
use hrpc::server::transport::http::Hyper;

// `tokio::main` is a Rust macro that converts an `async fn`
// `main` function into a synchronous `main` function, and enables
// you to use the `tokio` async runtime. The runtime we use is the
// multithreaded runtime, which is what we want.
#[tokio::main]
async fn main() -> Result<(), BoxError> {
    // Initialize the default logging in `tracing-subscriber`
    // which is logging to the terminal
    tracing_subscriber::fmt().init();
    
    // Create our chat service
    let service = ChatServer::new(ChatService::new());

    // Create our transport that we will use to serve our service
    let transport = Hyper::new("127.0.0.1:2289")?;

    // Layer our transport for use with CORS.
    // Since this is specific to HTTP, we use the transport's layer method.
    //
    // Note: A "layer" can simply be thought of as a middleware!
    let transport = transport.layer(CorsLayer::permissive());

    // Serve our service with our transport
    transport.serve(service).await?;

    Ok(())
}

Notice how in the code above, we needed to specify a CORS layer. The next step of the process, of course, is to write a frontend for this.

Frontend (CLI)

If you don't want to use the web client example, you can try the CLI client at hRPC examples repository. Keep in mind that this post doesn't cover writing a CLI client.

To run it, after you git clone the repository linked, navigate to chat/tui-client and run cargo run. Instructions also available in the READMEs in the repository.

Frontend (Vue 3 + Vite + TS)

NOTE: If you don't want to follow along, you can find the full web client example at hRPC examples repository.

The setup is a basic Vite project using the Vue template, with all of the boilerplate demo code removed. Once you have the project made, install the following packages:

npm i @protobuf-ts/runtime @protobuf-ts/runtime-rpc @harmony-dev/transport-hrpc

npm i -D @protobuf-ts/plugin @protobuf-ts/protoc windicss vite-plugin-windicss

In order to get Protobuf generation working, we'll use Buf, a tool specifically built for building protocol buffers. Start by making the following buf.gen.yaml:

version: v1
plugins:
  - name: ts
    out: gen
    opt: generate_dependencies,long_type_string
    path: ./node_modules/@protobuf-ts/plugin/bin/protoc-gen-ts

The config above invokes the code generator we installed, and enables a string representation for longs, and generating code for builtin google types too.

Now, paste the protocol from earlier into protocol/chat.proto in the root of the folder, and run buf generate ./protocol. If you see a gen folder appear, then the code generation worked! ✅

The Implementation

When building the UI, it's useful to have a live preview of our site. Run npm run dev in terminal which will start a new dev server.

The entire implementation will be done in src/App.vue, the main Vue component for the site.

For the business logic, we'll be using the new fancy and shiny Vue 3 script setup syntax. Start by defining it:

<script setup lang="ts">
</script>

Now, inside this block, we first create a chat client by passing our client configuration into the HrpcTransport constructor:

import { ChatClient } from "../gen/chat.client";
import { HrpcTransport } from "@harmony-dev/transport-hrpc";

const client = new ChatClient(
  new HrpcTransport({
    baseUrl: "http://127.0.0.1:2289",
    insecure: true
  })
);

Next, we will define a reactive list of messages, and content of the text input:

const content = ref("");
const msgs = reactive<string[]>([]);

These refs are used in the UI, and these are what we'll ultimately need to use in order to reflect a change.

Now let's add our API logic:

// when the component mounts (page loads)
onMounted(() => {
  // start streaming messages
  client.streamMessages({}).responses.onMessage((msg) => {
    // add the message to the list
    msgs.push(msg.content);
  });
});

// keyboard handler for the input
const onKey = (ev: KeyboardEvent) => {
  if (ev.key !== "Enter") return; // only send a message on enter
  client.sendMessage({
    content: content.value,
  }); // send a message to the server
  content.value = ""; // clear the textbox later
};

Now let's add some layouting and styling, with registered event handlers for the input and a v-for loop to display the messages:

<template>
  <div class="h-100vh w-100vw bg-surface-900 flex flex-col justify-center p-3">
    <div class="flex-1 p-3 flex flex-col gap-2 overflow-auto">
      <p class="p-3 max-w-30ch rounded-md bg-surface-800" v-for="m in msgs" :key="m">{{ m }}</p>
    </div>
    <input
      class="
        p-2
        bg-surface-700
        rounded-md
        focus:outline-none focus:ring-3
        ring-secondary-400
	mt-2
      "
      v-model="content"
      @keydown="send"
    />
  </div>
</template>

If you are unsure what these classes mean, take a look at WindiCSS to learn more.

And with that we complete our chat application!

Other Implementations

While we used Rust for server and TypeScript for client here, hRPC is cross-language. The harmony-development organisation on GitHub has other implementations, most located in the hRPC repo.

Tags: #libre #harmony
kate showing a completion for qml

kate showing another completion for qml

qml-lsp is a simple LSP server for QML. it currently only offers primitive non-context-aware completions, without anything else. it understands:

  • completing component names
  • completing properties defined in surrounding component (not properties from its superclasses)
  • completing enums

note that it doesn't understand project-local QML components, only stuff installed to the system QML dirs with qmlplugindump set up correctly.

regardless, it does a decent job at completing system types, and considering that Qt Creator struggles with some of the plugins that qml-lsp has no problem with, it's pretty usable and an improvement over the nothing found in editors other than Qt Creator.

you can check out the source at https://invent.kde.org/cblack/qew-em-el-el-ess-pee, or fetch a statically linked binary here. plonk the binary in your PATH under the name qml-lsp.

kate LSP config:

	"qml": {
		"command": ["qml-lsp"],
		"highlightingModeRegex": "^QML$"
	}

tags: #libre

the messages view showing a file thumbnail

Tok has seen a handful of improvements this week, one being that file messages now show a thumbnail if available.

Music View

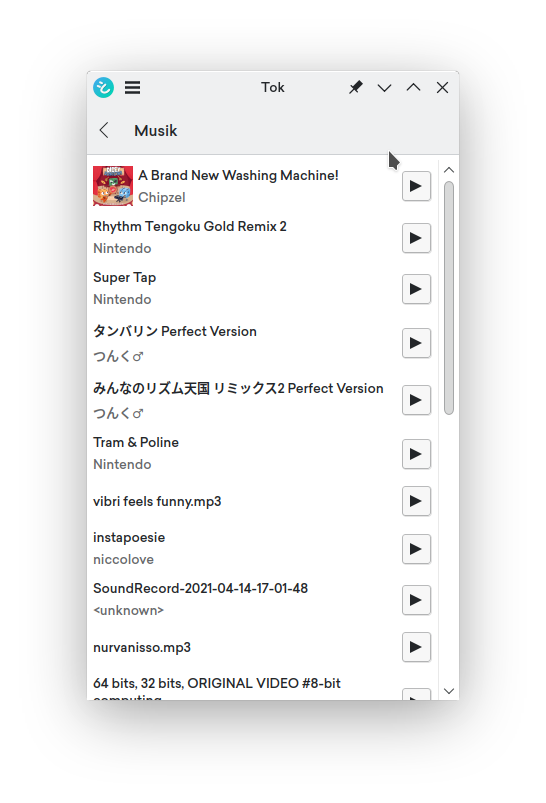
music view

Tok can now show you all songs that have been uploaded to a chat.

Hop To Message

Tok now allows you to hop to a message by tapping on it, no matter how far back in history it is.

Bugfixes:

  • messages with newlines can be sent
  • formatting works again
  • nix files updated
  • the message text field no longer keeps the last formatting applied when you send a message

Obtaining Tok

Tok can be built from source from https://invent.kde.org/network/tok.

There's a Telegram room for Tok available at https://t.me/kdetok, where you can come on and chat about anything Tok related, such as asking questions on using or building Tok.

Contributing

Interested in contributing? Come on by the dev chat and say hello!

Tags: #libre #tok